vuepress编写API文档
- 介绍
- 搭建
- 安装
- 初始化
- 配置
- 组件API文档
- 发布组件库
- 坑
- 没有高亮
介绍
想要搭建一个类似elementUI的组件库及相关的API文档,可以直接引用组件,还有代码展示,这里使用vuepress来搭建。详细配置可以前往vuepress官网查看。
搭建
安装
- 全局安装
vuepress
npm i vuepress -g
- 新建项目
mkdir my_vuepress
初始化
- 进入项目
cd my_vuepress
- 初始化项目
npm init
- 新建docs
mkdir docs
- 设置package.json
{
  "scripts": {
    "docs:dev": "vuepress dev docs",
    "docs:build": "vuepress build docs"
  }
}使用,npm run docs:dev(或者vuepress dev docs)运行项目,打开本地地址。
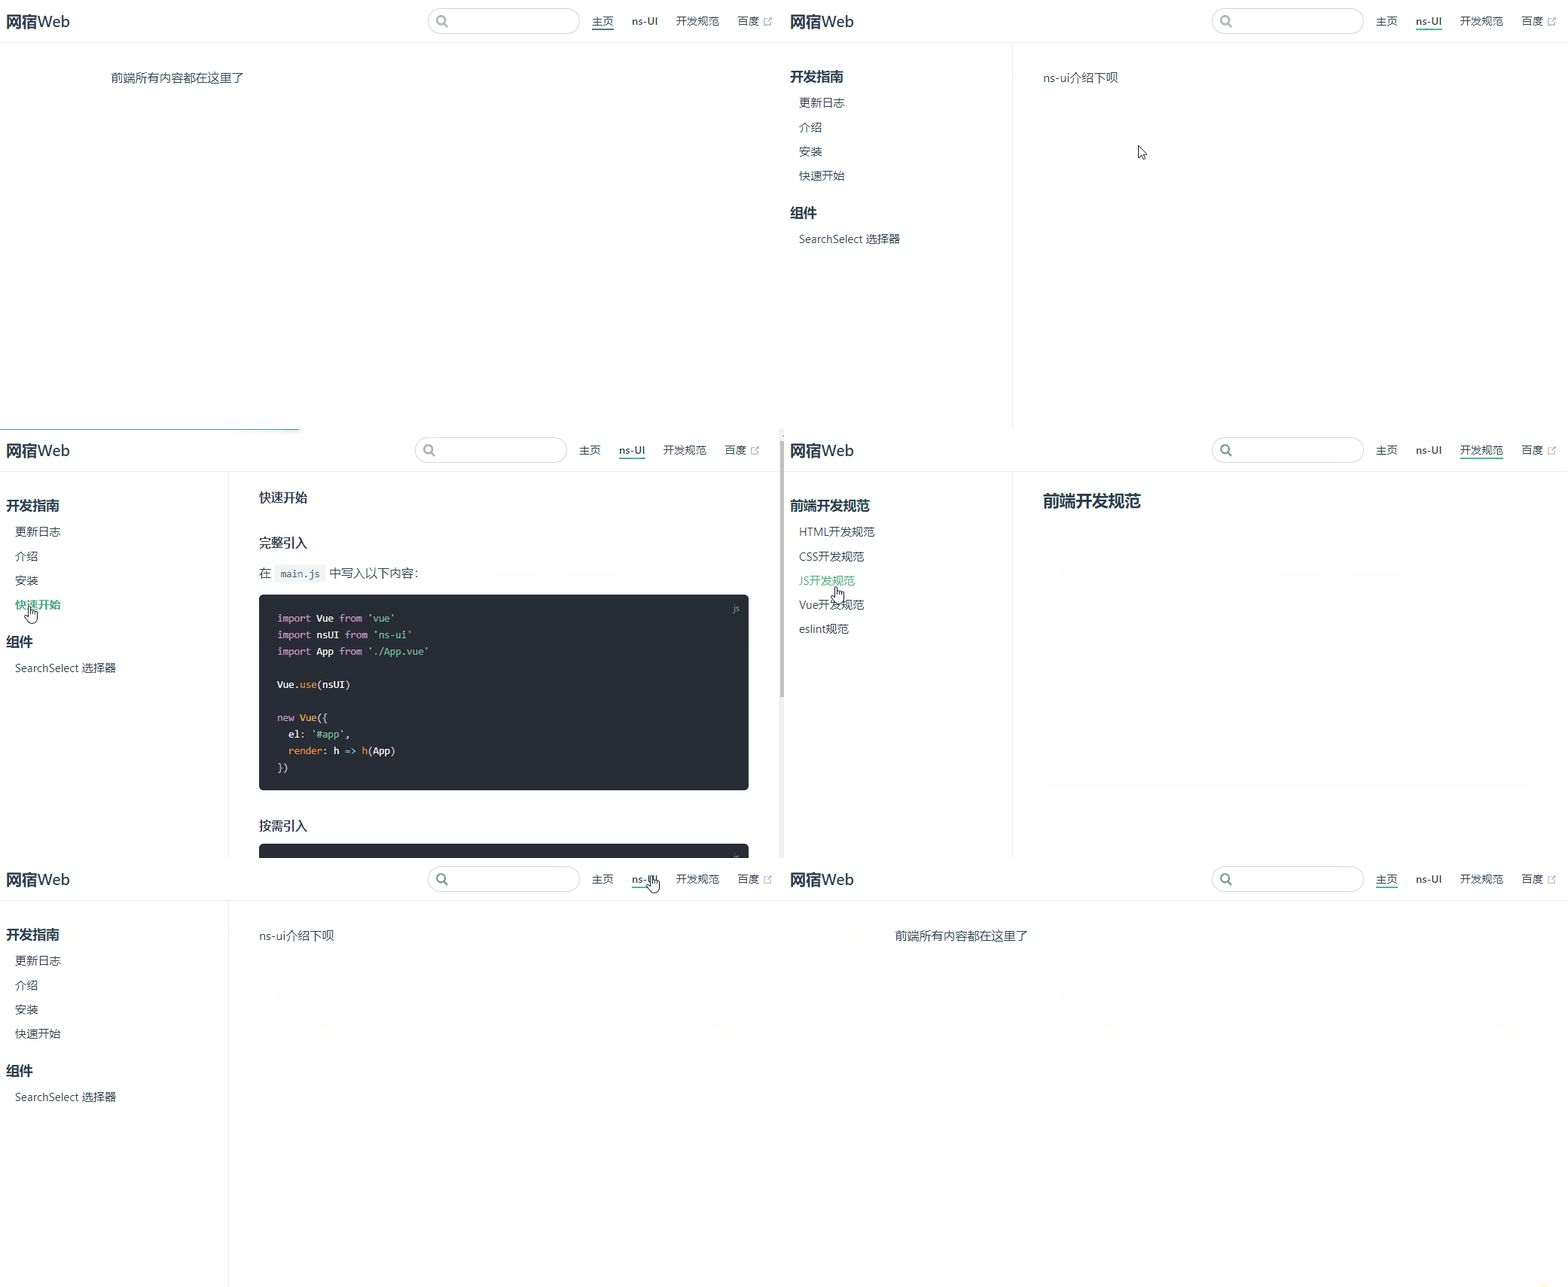
因为,当前文件夹docs中还没有内容,所以运行后内容为空:

此时,在docs文件夹中新建一个README.md文件,重启项目:

到此为止项目已经搭建完成,但是我们想要的是左边导航,查看不同组件的API文档,头部展示不同的分类,下面继续进行配置。
配置
- 创建
docs/.vuepress文件夹
cd docs
mkdir .vuepress
- 在
.vuepress中新建config.js文件,到此为止项目结构如下:
my_vuepress
├─── docs
│   ├── README.md
│   └── .vuepress
│       └── config.js
└── package.json- 头部信息和导航栏
// docs/.vuepress/config.js
module.exports = {
  title: '网宿Web',
  description: 'Just playing around',
  head: [],
  themeConfig: {
    nav: [
      { text: '主页', link: '/' },
      { text: 'ns-UI', link: '/ns-ui/' },
      { text: '开发规范', link: '/standard/'},
      { text: '百度', link: 'http://www.baidu.com' }
    ],
    sidebar: {
      '/ns-ui': [
        {
          title: '开发指南',
          collapsable: false,
          children: [
            '../ns-ui/logs/',
            '../ns-ui/guid/',
            '../ns-ui/install/',
            '../ns-ui/start/'
          ]
        },
        {
          title: '组件',
          collapsable: false,
          children: [
            ['../ns-ui/searchSelect/', 'SearchSelect 选择器']
          ]
        }
      ],
      '/standard': [
        {
          title: '前端开发规范',
          collapsable: false,
          children: [
            '../standard/html/',
            '../standard/css/',
            '../standard/js/',
            '../standard/vue/',
            '../standard/eslint/'
          ]
        }
      ]
    }
  }
}- 文件结构
my_vuepress
├─── docs
│   ├── README.md
│   └── .vuepress
│       └── config.js
│   └── ns-ui
│       └── guid
│       	└── README.md
│       └── install
│       	└── README.md
│       └── logs
│       	└── README.md
│       └── start
│       	└── README.md
│       └── searchSelect // 第一个组件API文档
│       	└── README.md
│   └── standard
│       └── css
│       	└── README.md
│       └── eslint
│       	└── README.md
│       └── js
│       	└── README.md
│       └── vue
│       	└── README.md
└── package.json
重启项目查看当前效果:

到此为止,纯的md文档已经完成,下面是需要将我们的组件显示在文档中。
组件API文档
文档其实还是和上面的README.md的书写差不多,只是路径修改了一下而已,最主要的不同其实是这里的文档中我们需要插入代码、显示我们的组件出来的效果,这里以wui-top-menu组件为例:
(注:这里时隔几个月以后再一次搭建了一个vuepress后对博客进行了二次编辑,希望出一个更详细的博客,所有有些文件名和内容跟上面创建的文件里的有些不同,理解精髓理解精髓)
具体查看README.md内容
// docs/ns-ui/wui-top-menu/README.md
<common-code-format>
  <div slot="componentNameTitle" class="component">
    <header class="component-name">wui-top-menu 头部导航</header>
  </div>

  <div slot="description">
    <header class="wui-description-title">基础用法</header>
  </div>

  <div slot="showComponents" class="wui-show-component">
    <top-menu-demo></top-menu-demo>
  </div>

  <highlight-code class="codeStyle" slot="showCode" lang="vue">
    <template>
      <wui-top-menu :menuData="menuData" />
    </template>
  </highlight-code>

  <highlight-code class="codeStyle" slot="showCode" lang="js">
    export default {
      data () {
        return {
          menuData: [
            {
              id: 370,
              label: 'WAF',
              url: '',
              children: [
                {
                  id: 458,
                  label: '策略管理',
                  url: '',
                  children: [
                    {
                      id: 469,
                      label: '频道管理',
                      url: '/channelManagement/channel/home'
                    },
                    {
                      id: 468,
                      label: '策略配置',
                      url: '/channelManagement/channel/config'
                    }
                  ]
                },
                {
                  id: 440,
                  label: '白名单配置',
                  url: '',
                  children: [
                    {
                      id: 455,
                      label: '通用配置',
                      url: '/whitelist/configure/home'
                    }
                  ]
                }
              ]
            }
          ]
        }
      }
    }
  </highlight-code>
</common-code-format>

<common-api-format>
  <thead slot="form-header" class="formHead">
    <tr class="formHeadRow">
      <th class="formHeadCol">参数</th>
      <th class="formHeadCol">说明</th>
      <th class="formHeadCol">类型</th>
      <th class="formHeadCol">可选值</th>
      <th class="formHeadCol">默认值</th>
    </tr>
  </thead>
  <tbody slot="form-body" class="formBody">
    <tr class="formBodyRow">
      <td class="formBodyCol">menuData</td>
      <td class="formBodyCol">菜单数据</td>
      <td class="formBodyCol">Array</td>
      <td class="formBodyCol">—</td>
      <td class="formBodyCol">—</td>
    </tr>
  </tbody>
</common-api-format>其中我们看到标签<common-code-format>,在vuepress中,在.vuepress/components/下新建的内容会自动注册为全局的组件,不用引入可以直接使用,对应的插槽中插入的内容都有对应的样式渲染。具体内容如下:

上面的插槽slot="showComponents"我们可以看到我们直接使用了一个全局标签,也是同样的道理,我们也要在.vuepress/components/中注册我们的全局组件,like this:

这里就将<wui-top-menu>注册为了全局组件供README.md文件使用了。
我们看下效果

对了,关于API中代码的高亮,以及我们是基于element-ui的二次开发,我们需要引入这些依赖,在docs/.vuepress/下新建enhanceApp.js文件(开头代码也展示过,这里说明下):
// /.vuepress/enhanceApp.js
import VueHighlightJS from 'vue-highlight.js'
import 'highlight.js/styles/dark.css'
import ElementUI from 'element-ui'
import 'element-ui/lib/theme-chalk/index.css'

export default ({
  Vue,
}) => {
  Vue.use(VueHighlightJS),
  Vue.use(ElementUI)
}
别忘了安装对应的依赖
npm i element-ui
npm i highlight.js
npm i vue-highlight.js
npm i sass-loader --save-dev
npm i node-sass --save-dev
关于我们的组件库中单个组件的文件结构可以看下图:

这里我们先不install组件,目前为止我们只是在本项目中利用相对路径访问,还未用到Vue的组件注册。
发布组件库
下面我们需要将我们的Wui里面的组件发布出去,我们的Wui像element-ui一样包含很多我们的业务组件。这里我们就需要涉及到Vue组件的全局注册以及发布了。
我们想要发布的是Wui,我们先进入到Wui目录下,然后,参考前一篇博客
坑
没有高亮
如果你按照以上步骤执行和安装后发现你的文档中的代码没有高亮效果,检查一下你的依赖版本"vue-highlight.js": "^2.2.0",如果你的vue-highlight.js版本不是这个,你可以降一下版本然后再运行看看。我后期再写这个的时候安装了一个3.x的版本就没有高亮效果,也没有找到有效的解决方法,所以暂时就用2.2.0版本的就可以达到我们想要的效果。如果有使用最新版本解决高亮效果的麻烦留言告我一下,谢谢。
