基于PyOpenGL和Pygame的增强现实实现
- 简单的增强现实静态实现
- 增强现实的视频动态实现
环境配置:
- 首先我们要先安装pygame和PyopenGL
pygame 可以直接在运行中里pip install pygame直接安装
pyopenGL的话如果用语句pip install opengl是默认安装的是32位系统的,如果电脑为64位的可以到https://www.lfd.uci.edu/~gohlke/pythonlibs/#pyopengl ctrl+F搜索PyOpenGL,选择适应自己python版本的64位下载 - 我的python版本是3.5.2的,下载完后在运行里输入语句
pip install PyOpenGL-3.1.3b2-cp35-cp35m-win_amd64.whl下载


安装完成后就可以开始测试了。
用的代码基本都为<python计算机视觉>书上的代码,基本只要改个图片路径就可以运行了。
简单的增强现实静态实现
简单立方体实现:
from pylab import *
from PIL import Image

# If you have PCV installed, these imports should work
from PCV.geometry import homography, camera
from PCV.localdescriptors import sift

"""
This is the augmented reality and pose estimation cube example from Section 4.3.
"""


def cube_points(c, wid):
    """ Creates a list of points for plotting
        a cube with plot. (the first 5 points are
        the bottom square, some sides repeated). """
    p = []
    # bottom
    p.append([c[0]-wid, c[1]-wid, c[2]-wid])
    p.append([c[0]-wid, c[1]+wid, c[2]-wid])
    p.append([c[0]+wid, c[1]+wid, c[2]-wid])
    p.append([c[0]+wid, c[1]-wid, c[2]-wid])
    p.append([c[0]-wid, c[1]-wid, c[2]-wid]) #same as first to close plot

    # top
    p.append([c[0]-wid, c[1]-wid, c[2]+wid])
    p.append([c[0]-wid, c[1]+wid, c[2]+wid])
    p.append([c[0]+wid, c[1]+wid, c[2]+wid])
    p.append([c[0]+wid, c[1]-wid, c[2]+wid])
    p.append([c[0]-wid, c[1]-wid, c[2]+wid]) #same as first to close plot

    # vertical sides
    p.append([c[0]-wid, c[1]-wid, c[2]+wid])
    p.append([c[0]-wid, c[1]+wid, c[2]+wid])
    p.append([c[0]-wid, c[1]+wid, c[2]-wid])
    p.append([c[0]+wid, c[1]+wid, c[2]-wid])
    p.append([c[0]+wid, c[1]+wid, c[2]+wid])
    p.append([c[0]+wid, c[1]-wid, c[2]+wid])
    p.append([c[0]+wid, c[1]-wid, c[2]-wid])

    return array(p).T


def my_calibration(sz):
    """
    Calibration function for the camera (iPhone4) used in this example.
    """
    row, col = sz
    fx = 2555*col/2592
    fy = 2586*row/1936
    K = diag([fx, fy, 1])
    K[0, 2] = 0.5*col
    K[1, 2] = 0.5*row
    return K


# compute features
sift.process_image('book1.jpg', 'im0.sift')
l0, d0 = sift.read_features_from_file('im0.sift')

sift.process_image('book2.jpg', 'im1.sift')
l1, d1 = sift.read_features_from_file('im1.sift')


# match features and estimate homography
matches = sift.match_twosided(d0, d1)
ndx = matches.nonzero()[0]
fp = homography.make_homog(l0[ndx, :2].T)
ndx2 = [int(matches[i]) for i in ndx]
tp = homography.make_homog(l1[ndx2, :2].T)

model = homography.RansacModel()
H, inliers = homography.H_from_ransac(fp, tp, model)

# camera calibration
K = my_calibration((747, 1000))

# 3D points at plane z=0 with sides of length 0.2
box = cube_points([0, 0, 0.1], 0.1)

# project bottom square in first image
cam1 = camera.Camera(hstack((K, dot(K, array([[0], [0], [-1]])))))
# first points are the bottom square
box_cam1 = cam1.project(homography.make_homog(box[:, :5]))


# use H to transfer points to the second image
box_trans = homography.normalize(dot(H,box_cam1))

# compute second camera matrix from cam1 and H
cam2 = camera.Camera(dot(H, cam1.P))
A = dot(linalg.inv(K), cam2.P[:, :3])
A = array([A[:, 0], A[:, 1], cross(A[:, 0], A[:, 1])]).T
cam2.P[:, :3] = dot(K, A)

# project with the second camera
box_cam2 = cam2.project(homography.make_homog(box))


# plotting
im0 = array(Image.open('book1.jpg'))
im1 = array(Image.open('book2.jpg'))

figure()
imshow(im0)
plot(box_cam1[0, :], box_cam1[1, :], linewidth=3)
title('2D projection of bottom square')
axis('off')

figure()
imshow(im1)
plot(box_trans[0, :], box_trans[1, :], linewidth=3)
title('2D projection transfered with H')
axis('off')

figure()
imshow(im1)
plot(box_cam2[0, :], box_cam2[1, :], linewidth=3)
title('3D points projected in second image')
axis('off')

show()
效果图:


茶壶模型实现:
import math
import pickle
from pylab import *
from OpenGL.GL import *
from OpenGL.GLU import *
from OpenGL.GLUT import *
import pygame, pygame.image
from pygame.locals import *
from PCV.geometry import homography, camera
from PCV.localdescriptors import sift

def cube_points(c, wid):
    p = []
    # bottom
    p.append([c[0]-wid, c[1]-wid, c[2]-wid])
    p.append([c[0]-wid, c[1]+wid, c[2]-wid])
    p.append([c[0]+wid, c[1]+wid, c[2]-wid])
    p.append([c[0]+wid, c[1]-wid, c[2]-wid])
    p.append([c[0]-wid, c[1]-wid, c[2]-wid]) #same as first to close plot

    # top
    p.append([c[0]-wid, c[1]-wid, c[2]+wid])
    p.append([c[0]-wid, c[1]+wid, c[2]+wid])
    p.append([c[0]+wid, c[1]+wid, c[2]+wid])
    p.append([c[0]+wid, c[1]-wid, c[2]+wid])
    p.append([c[0]-wid, c[1]-wid, c[2]+wid]) #same as first to close plot

    # vertical sides
    p.append([c[0]-wid, c[1]-wid, c[2]+wid])
    p.append([c[0]-wid, c[1]+wid, c[2]+wid])
    p.append([c[0]-wid, c[1]+wid, c[2]-wid])
    p.append([c[0]+wid, c[1]+wid, c[2]-wid])
    p.append([c[0]+wid, c[1]+wid, c[2]+wid])
    p.append([c[0]+wid, c[1]-wid, c[2]+wid])
    p.append([c[0]+wid, c[1]-wid, c[2]-wid])

    return array(p).T

def my_calibration(sz):
    row, col = sz
    fx = 2555*col/2592
    fy = 2586*row/1936
    K = diag([fx, fy, 1])
    K[0, 2] = 0.5*col
    K[1, 2] = 0.5*row
    return K

def set_projection_from_camera(K):
	glMatrixMode(GL_PROJECTION)
	glLoadIdentity()
	fx = K[0,0]
	fy = K[1,1]
	fovy = 2*math.atan(0.5*height/fy)*180/math.pi
	aspect = (width*fy)/(height*fx)
	near = 0.1
	far = 100.0
	gluPerspective(fovy,aspect,near,far)
	glViewport(0,0,width,height)

def set_modelview_from_camera(Rt):
	glMatrixMode(GL_MODELVIEW)
	glLoadIdentity()
	Rx = np.array([[1,0,0],[0,0,-1],[0,1,0]])
	R = Rt[:,:3]
	U,S,V = np.linalg.svd(R)
	R = np.dot(U,V)
	R[0,:] = -R[0,:]
	t = Rt[:,3]
	M = np.eye(4)
	M[:3,:3] = np.dot(R,Rx)
	M[:3,3] = t
	M = M.T
	m = M.flatten()
	glLoadMatrixf(m)

def draw_background(imname):
	bg_image = pygame.image.load(imname).convert()
	bg_data = pygame.image.tostring(bg_image,"RGBX",1)
	glMatrixMode(GL_MODELVIEW)
	glLoadIdentity()

	glClear(GL_COLOR_BUFFER_BIT | GL_DEPTH_BUFFER_BIT)
	glEnable(GL_TEXTURE_2D)
	glBindTexture(GL_TEXTURE_2D,glGenTextures(1))
	glTexImage2D(GL_TEXTURE_2D,0,GL_RGBA,width,height,0,GL_RGBA,GL_UNSIGNED_BYTE,bg_data)
	glTexParameterf(GL_TEXTURE_2D,GL_TEXTURE_MAG_FILTER,GL_NEAREST)
	glTexParameterf(GL_TEXTURE_2D,GL_TEXTURE_MIN_FILTER,GL_NEAREST)
	glBegin(GL_QUADS)
	glTexCoord2f(0.0,0.0); glVertex3f(-1.0,-1.0,-1.0)
	glTexCoord2f(1.0,0.0); glVertex3f( 1.0,-1.0,-1.0)
	glTexCoord2f(1.0,1.0); glVertex3f( 1.0, 1.0,-1.0)
	glTexCoord2f(0.0,1.0); glVertex3f(-1.0, 1.0,-1.0)
	glEnd()
	glDeleteTextures(1)


def draw_teapot(size):
	glEnable(GL_LIGHTING)
	glEnable(GL_LIGHT0)
	glEnable(GL_DEPTH_TEST)
	glClear(GL_DEPTH_BUFFER_BIT)
	glMaterialfv(GL_FRONT,GL_AMBIENT,[0,0,0,0])
	glMaterialfv(GL_FRONT,GL_DIFFUSE,[0.5,0.0,0.0,0.0])
	glMaterialfv(GL_FRONT,GL_SPECULAR,[0.7,0.6,0.6,0.0])
	glMaterialf(GL_FRONT,GL_SHININESS,0.25*128.0)
	glutSolidTeapot(size)

width,height = 1000,747
def setup():
	pygame.init()
	pygame.display.set_mode((width,height),OPENGL | DOUBLEBUF)
	pygame.display.set_caption("OpenGL AR demo")

# compute features
sift.process_image('book_frontal.JPG', 'im0.sift')
l0, d0 = sift.read_features_from_file('im0.sift')

sift.process_image('book_perspective.JPG', 'im1.sift')
l1, d1 = sift.read_features_from_file('im1.sift')

# match features and estimate homography
matches = sift.match_twosided(d0, d1)
ndx = matches.nonzero()[0]
fp = homography.make_homog(l0[ndx, :2].T)
ndx2 = [int(matches[i]) for i in ndx]
tp = homography.make_homog(l1[ndx2, :2].T)

model = homography.RansacModel()
H, inliers = homography.H_from_ransac(fp, tp, model)

K = my_calibration((747, 1000))
cam1 = camera.Camera(hstack((K, dot(K, array([[0], [0], [-1]])))))
box = cube_points([0, 0, 0.1], 0.1)
box_cam1 = cam1.project(homography.make_homog(box[:, :5]))
box_trans = homography.normalize(dot(H,box_cam1))
cam2 = camera.Camera(dot(H, cam1.P))
A = dot(linalg.inv(K), cam2.P[:, :3])
A = array([A[:, 0], A[:, 1], cross(A[:, 0], A[:, 1])]).T
cam2.P[:, :3] = dot(K, A)

Rt=dot(linalg.inv(K),cam2.P)

setup()
draw_background("book_perspective.bmp")
set_projection_from_camera(K)
set_modelview_from_camera(Rt)
draw_teapot(0.05)

pygame.display.flip()
while True:
	for event in pygame.event.get():
		if event.type==pygame.QUIT:
			sys.exit()
书上图片的效果图:

我自己拍的图片的效果图:

代码调试:
- 若遇到错误:freeglut ERROR: Function called without first calling ‘glutInit’.是因为freeglut把原来glut库中的很多函数都重写了
解决方法:
打开电脑里安装的python文件夹里的Lib\site-packages\OpenGL\DLLS
(如果是anaconda安装的python就打开Anaconda3\Lib\site-packages\OpenGL\DLLS)
将里面的freeglut64.vc14.dll删除即可

- 若问题出现sift not found则是sift文件还没有调好
出现only integers, slices (:), ellipsis (...), numpy.newaxis (None) and integer or boolean arrays are valid indices
只需要在sift文件里加一个强制转换就行了

其他sift出现的问题可以到我前一篇关于sift算法的博客去看看。
增强现实的视频动态实现
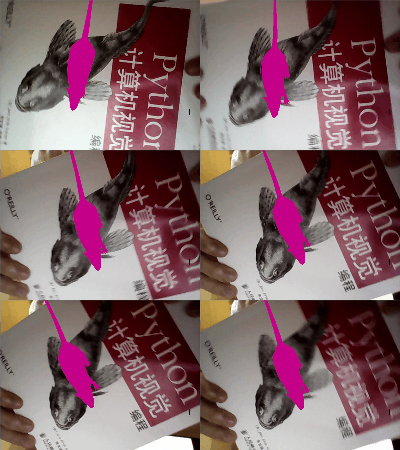
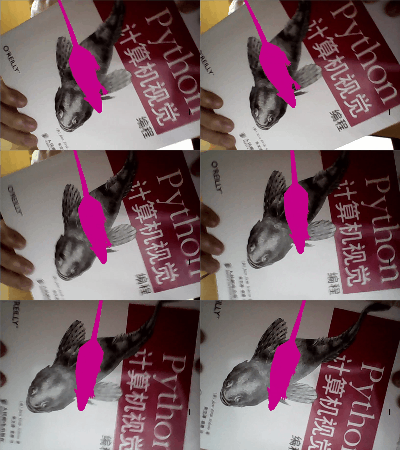
我的增强现实的视频动态是基于电脑摄像头直接实现,具体实现代码可参考链接
实现代码:
摄像头动态实现效果:


效果还凑合哈。
